If you have already purchased a domain name, learn how to create a subdomain on Hostinger with a simple guide.
Creating a subdomain in Hostinger is as simple as adding a new room to your home.
It allows you to better organize your website by having dedicated areas for your blog, online store, or portfolio.
What is a subdomain?
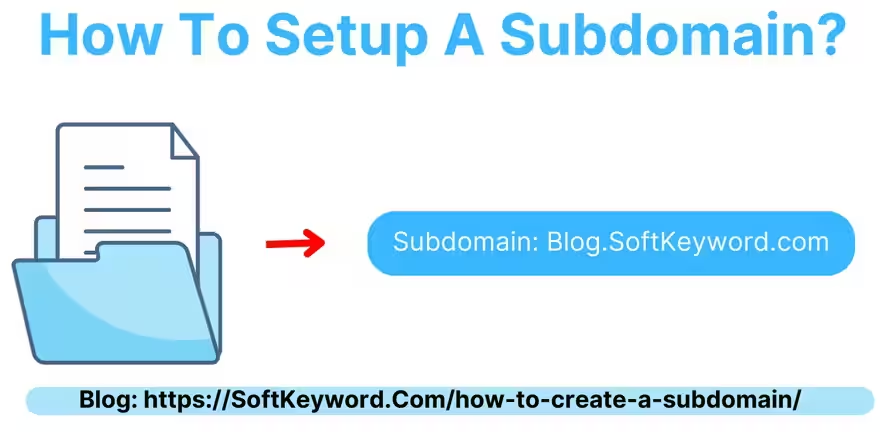
A subdomain is a smaller part of your main website, with its unique address. For instance, under example.com, a subdomain might be blog.example.com.

Why Should You Make a Subdomain?
You might be thinking, “Why go through the trouble of making a subdomain?”
Well, there are loads of good reasons!
It’s a great way to sort out different sections of your website.
- Create separate sections for specific types of content.
- Improve your site’s visibility on search engines.
- Run multiple websites from a single hosting account.
How to create a subdomain in Hostinger?
Alright, let’s dive right in!
Here’s a quick rundown, step by step.
Step #1: Log into Your Hostinger hPanel Account
First up, you need to get into your Hostinger control panel. Then Go to the “Websites” section. There you will find the “Dashboard” button; click on that.

Step #2: Head to the Subdomain Section
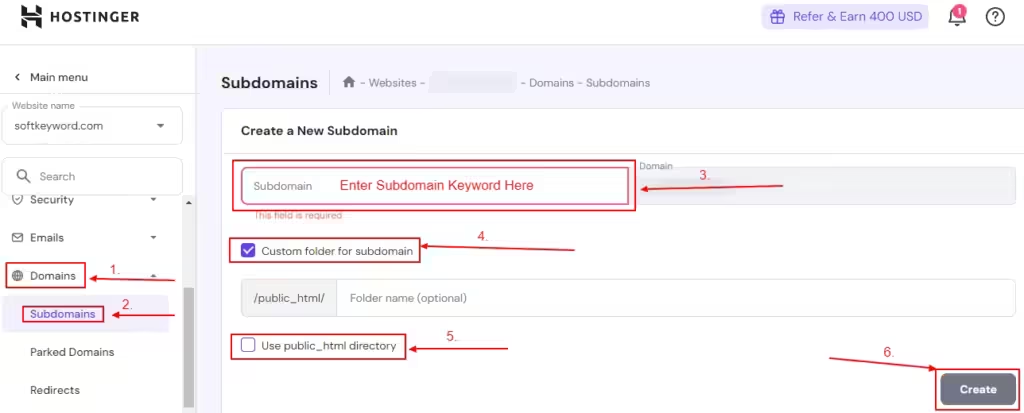
Now, here you have the “Domains” option, which is usually on the left side of your dashboard.
Under “Domains,” select “Subdomains,” and then you will see a new interface where you can set up your subdomain.

Now, in the “Subdomains” section, you will find an option to create a subdomain. Enter the name you want for your subdomain (like “blog” or “store”) in the given box.
(Optional Step) Select “Custom folder for subdomain”, if you want to put your subdomain files in a custom folder on the host.
(Optional Step) Select “Use public_html directory” if you want to put your subdomain file in the public_html directory.
Note: Create a Custom Folder: If you want, you can set up a custom folder for your subdomain to keep things tidy.
Step #3: Check Your Subdomain
Once you are done with filling and selecting options, finally hit the “Create” button on the right-hand side.
And just like that, your subdomain is all set!
You will see that your subdomain is created. You can check your subdomain with its host directory.
And you also have an option to delete your subdomain right away.

Now your subdomain is created. When you visit your subdomain, you will see it like this.

This is because you just set up the subdomain, not the subdomain’s (website’s) file.
Step #4: Create your brand new site/pages with your new subdomain.
Here you can manage your subdomain to create and design pages on your subdomain however you want.

Setting up a subdomain on Hostinger is super easy!
I’ve been a Hostinger customer for a couple of years, and I’ve always appreciated how user-friendly their platform is.
And their customer service is excellent too. Don’t hesitate any longer—go ahead and create that subdomain to better manage your online presence!
Creating a subdomain in Hostinger is something that many people wonder about. By using these easy steps, you’ll become a subdomain expert in no time!
Wrapping up
How to create a subdomain in Hostinger? It’s way simpler than you might think!
Just follow these easy steps, and you’ll have a new subdomain up and running in no time.
If you’re stuck, just leave your questions below.
Let’s get to it!

